Wix allows you to build beautiful websites. Add the power of Leadsources to your Wix website to start tracking the UTM parameters and other lead source data for every lead you generate. Follow this guide to add the Leadsources tracking code to your Wix website.
Step 1: Copy the Leadsources code #
If you haven’t done it already, copy the Leadsource code you need to install in the head tag of your site:
- Create an account on leadsources.io (free 14-day trial).
- Log in to leadsources.io from the login page
- Click the “Setup Tracking” tab on the top left
- Copy the Leadsources code that you will find under “Step 1: Install tracking code” (as shown below)

Step 2: Install the Leadsources code in the head tag of your Wix site #
Now that you have copied the Leadsources code, you have to paste it into the head tag of your Wix site. Here is how:
1. Open your Wix website editor #
Go to the Wix website editor by logging into your Wix account and selecting the site you want to edit.
2. Access the “tracking tools “Custom code” section #
In the Wix editor, click on the Settings tab in the left-hand menu.
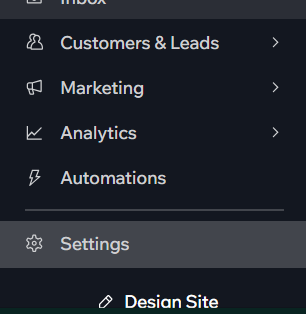
From the settings menu, scroll down to the bottom of the page, and click Custom code.
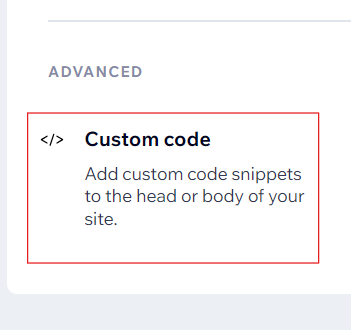
3. Add new custom code #
In the Custom code section, click on the + Add Custom Code button.
In the Paste the code snippet here field, paste the Leadsources tracking code you copied previously.
Choose All Pages in the Add Code to Pages section.
Select Body – end in the Place Code in section.
4. Select Code Type #
Click on Code Type, and select Essential. It will ensure that your Leadsources code is triggered on all the pages of your site.
5. Save and publish #
After pasting the code, click on Apply.
Publish your site to make sure the Leadsources code is active on all pages.
6. Enable the Leadsources code #
Back in the Wix settings, ensure that the code you added is enabled by checking the switch next to the Leadsources code.
Step 3: Test the code installation #
To verify that the Leadsources code has been properly implemented in your website, follow these simple steps:
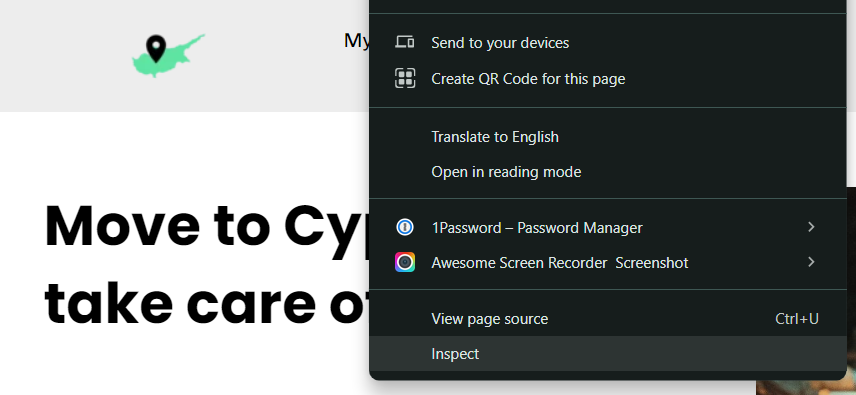
Go to any page on your website.
Right-click, then click on “Inspect“.
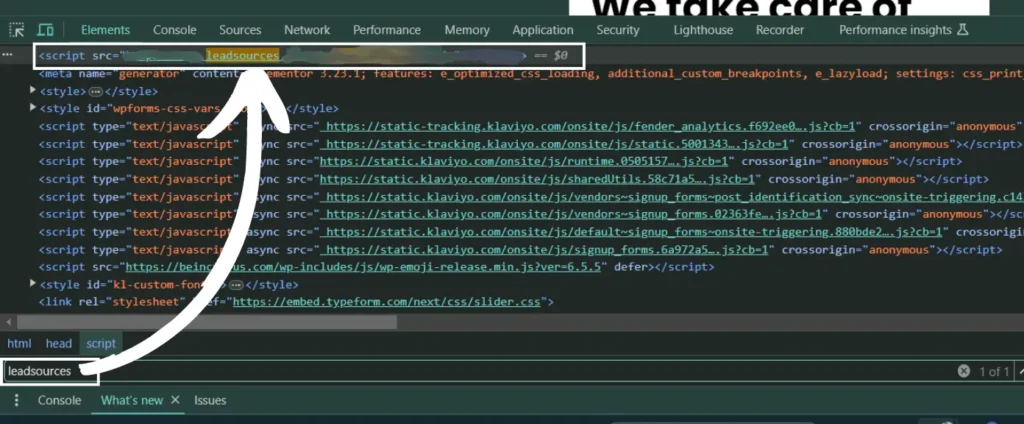
The source code window appears. From there, perform a search:
- On PC: Ctrl+F
- On Mac: Command-spacebar
Search for the term “leadsources”.
If the Leadsources code appears, it means that you have implemented the code properly.
If you don’t see the code appearing, contact our support team.
Next step: install the hidden fields #
You have now installed properly the Leadsources code in the head tag of your website.
Now, every time someone visits your site, Leadsources captures up to 7 lead source data points:
- Channel
- Source
- Campaign
- Term
- Content
- Landing Page
- Landing Page Subfolder
The second step is to create hidden fields in your form builder to pass this lead source data in your form.
The process of adding hidden fields to your form depends on the form builder used (Typeform, WP Forms, etc.).
We have created a detailed guide for each form builder. Visit our hidden fields page to find out how.


