Hostinger allows you to build beautiful websites. Add the power of Leadsources to your Hostinger website to start tracking the UTM parameters and other lead source data for every lead you generate. Follow this guide to add the Leadsources tracking code to your Hostinger website.
Step 1: Copy the Leadsources code #
If you haven’t done it already, copy the Leadsource code you need to install in the head tag of your site:
- Create an account on leadsources.io (free 14-day trial).
- Log in to leadsources.io from the login page
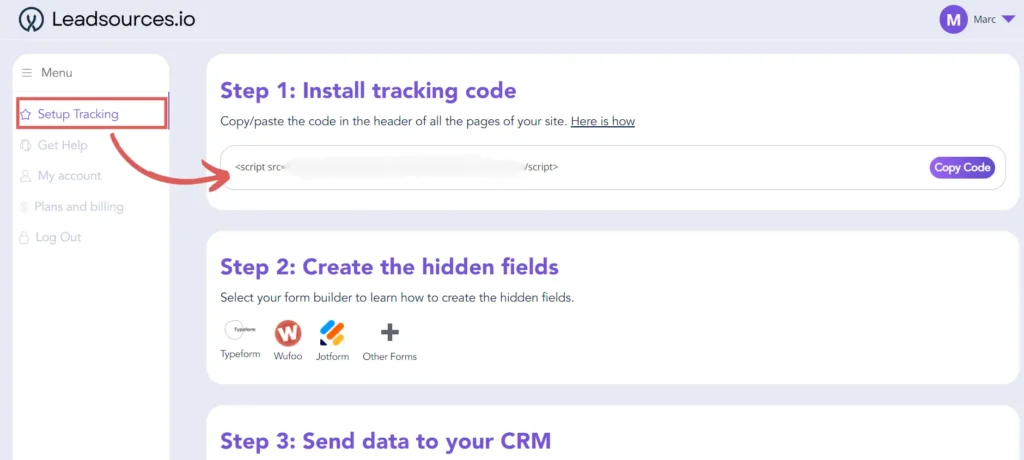
- Click the “Setup Tracking” tab on the top left
- Copy the Leadsources code that you will find under “Step 1: Install tracking code” (as shown below)
Step 2: Add the Leadsources code in the head tag of your Hostinger website #
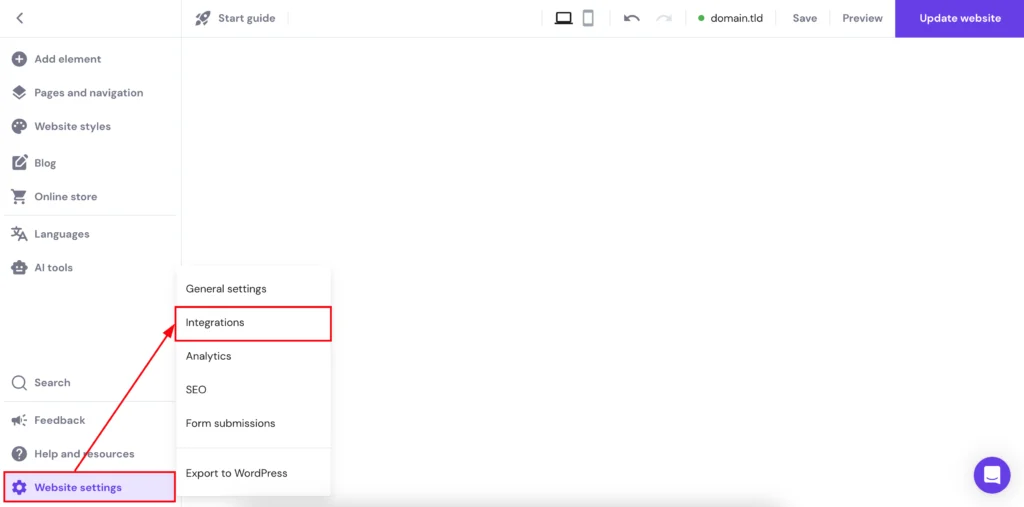
Access to the Hostinger site builder.
Go to Website settings → Integrations.
Paste the Leadsouces code into the Custom code field.
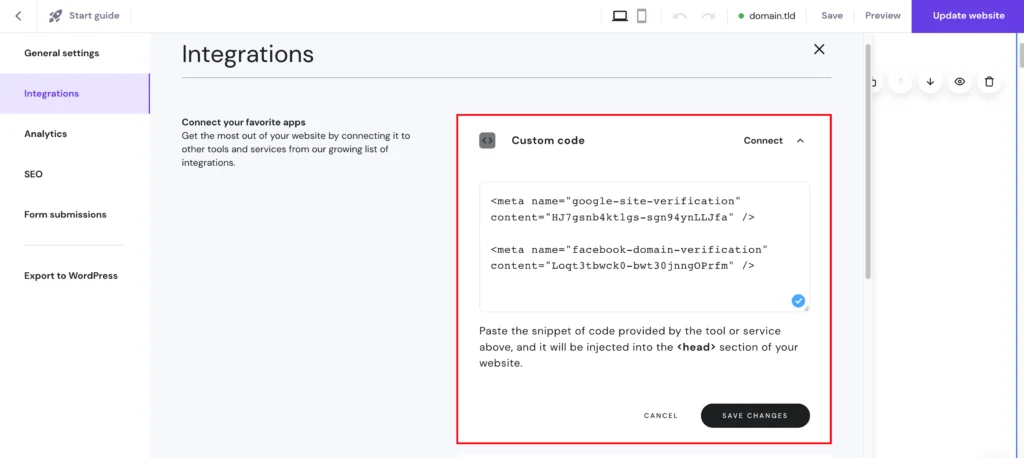
Click Save changes.
Don’t forget to update your website to publish the changes.
Step 3: Test the code installation #
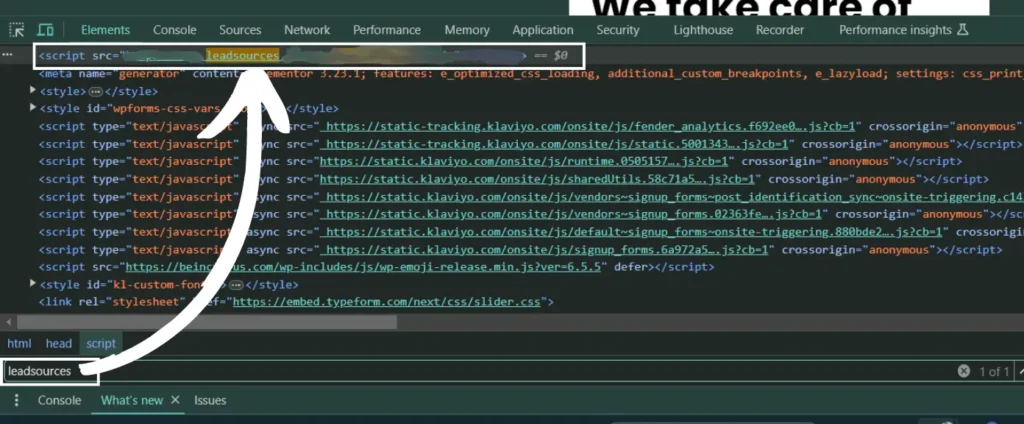
To verify that the Leadsources code has been properly implemented in your website, follow these simple steps:
Go to any page on your website.
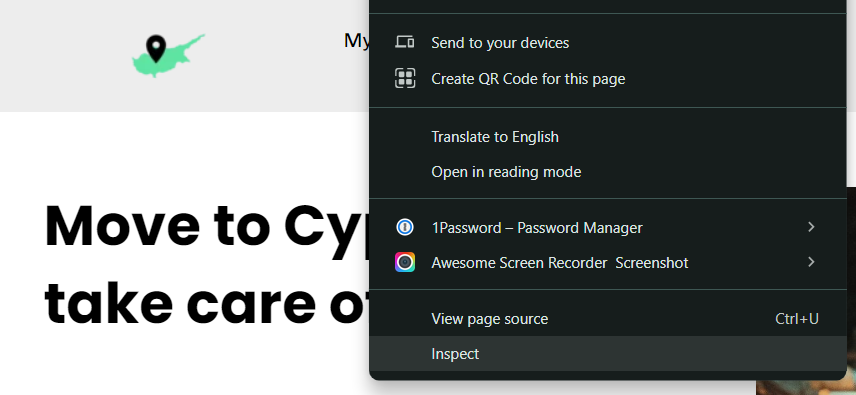
Right-click, then click on “Inspect“.
The source code window appears. From there, perform a search:
- On PC: Ctrl+F
- On Mac: Command-spacebar
Search for the term “leadsources”.
If the Leadsources code appears, it means that you have implemented the code properly.
If you don’t see the code appearing, contact our support team.