ActiveCampaign allows you to build forms and capture leads on your website.
With LeadSources, you can track the source of the leads generated in ActiveCampaign, alongside other lead source data.
In this guide, we will show you how to add hidden fields in ActiveCampaign to start capturing the source of your leads.
Step 1: Create custom fields #
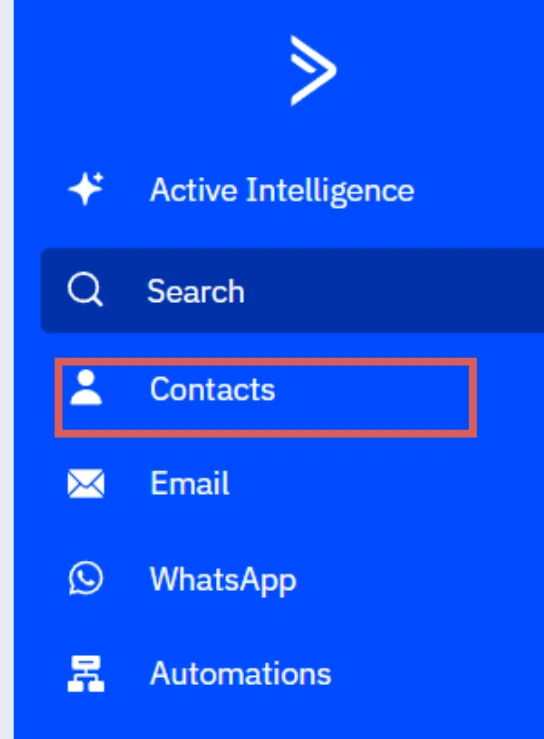
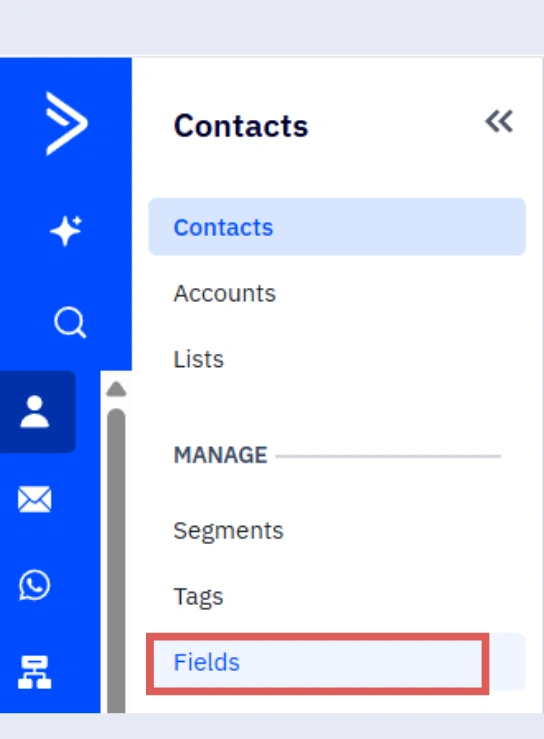
From your ActiveCampaign account, click Contact > Fields
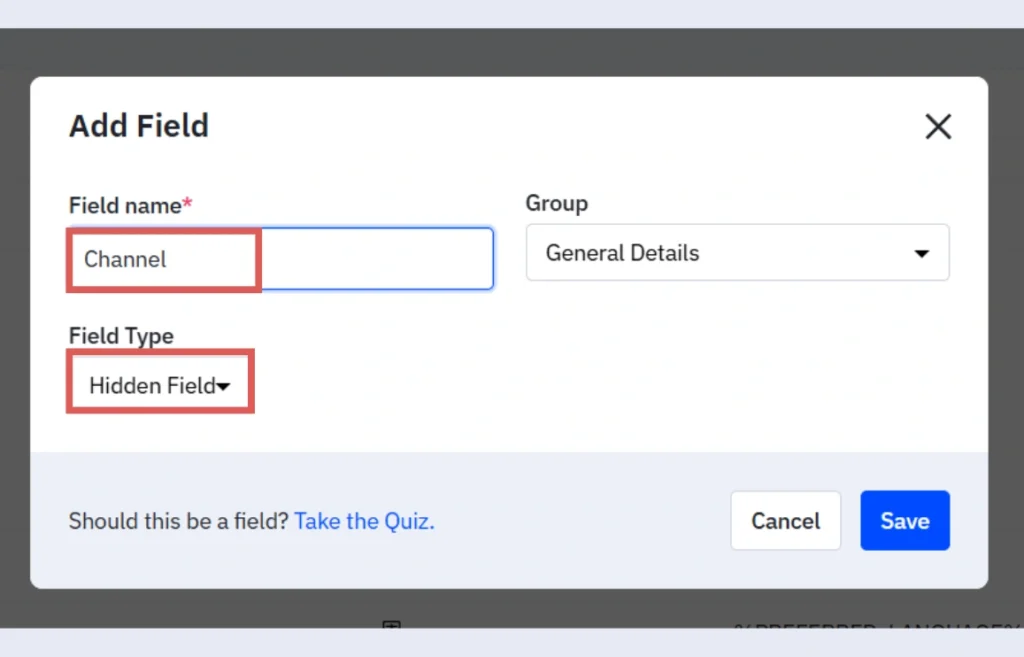
Click the Add Field button.
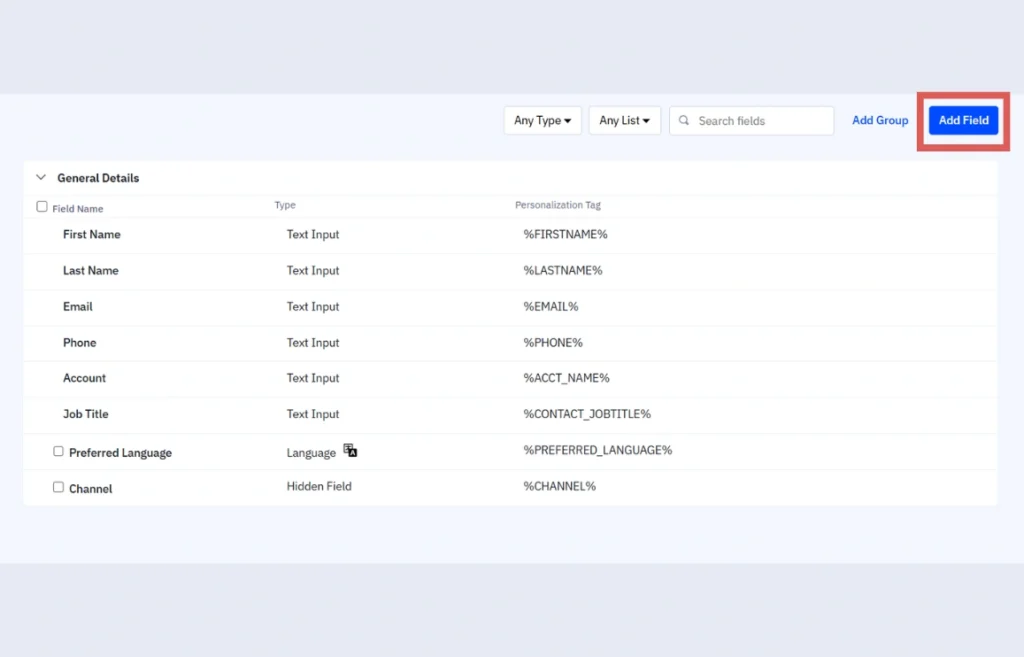
The Add Field pop-up opens.
Name the field Channel > Field type Hidden Field> Click Save.
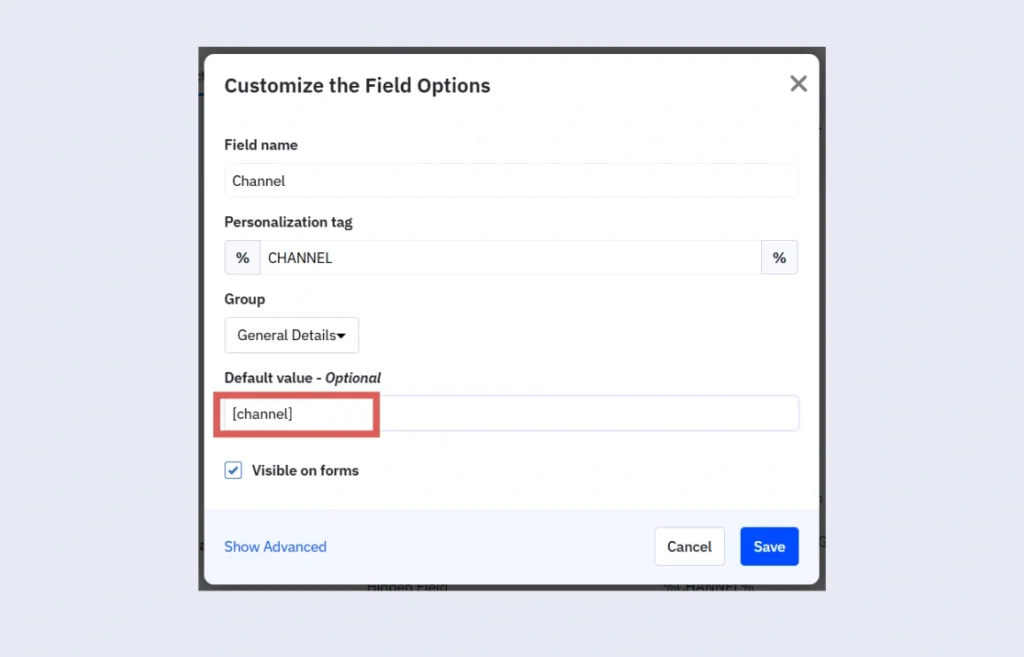
Open the new Channel field by clicking the edit icon > Under Default value, write [channel] > Click Save.
Repeat these steps for all the other fields:
| Custom field name | Default value |
| Source | [source] |
| Campaign | [campaign] |
| Term | [term] |
| Content | [content] |
| Landing page | [landingpage] |
| Landing page subfolder | [landingpagesubfolder] |
Step 2: Add the hidden fields #
Context: In this step, we add the hidden fields to our form to store the lead source data captured by LeadSources.
First, open your ActiveCampaign form: from your ActiveCampaign dashboard > Click Website > Click Forms > Open your form.
Scroll down on the right panel to find the Custom Fields section > Find the Channel field > Drag it in your form.
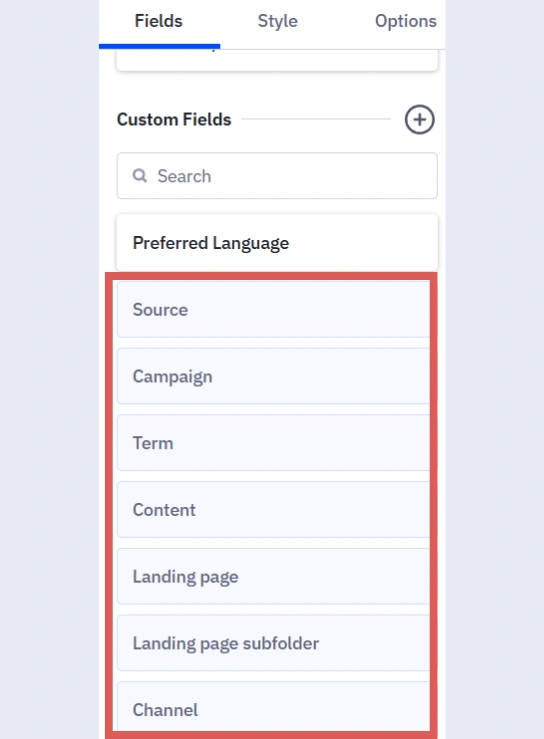
Repeat the same step to add the other hidden fields:
- Source
- Campaign
- Term
- Content
- Landing page
- Landing page subfolder
Your form should look like this:
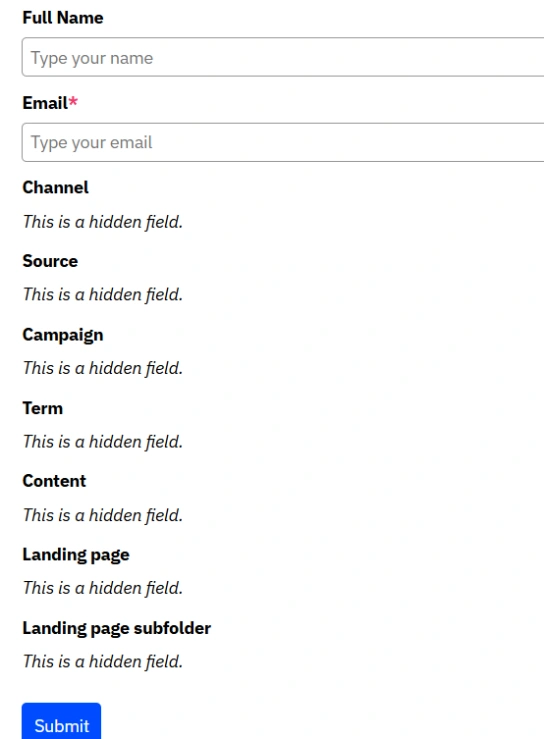
You are all set!
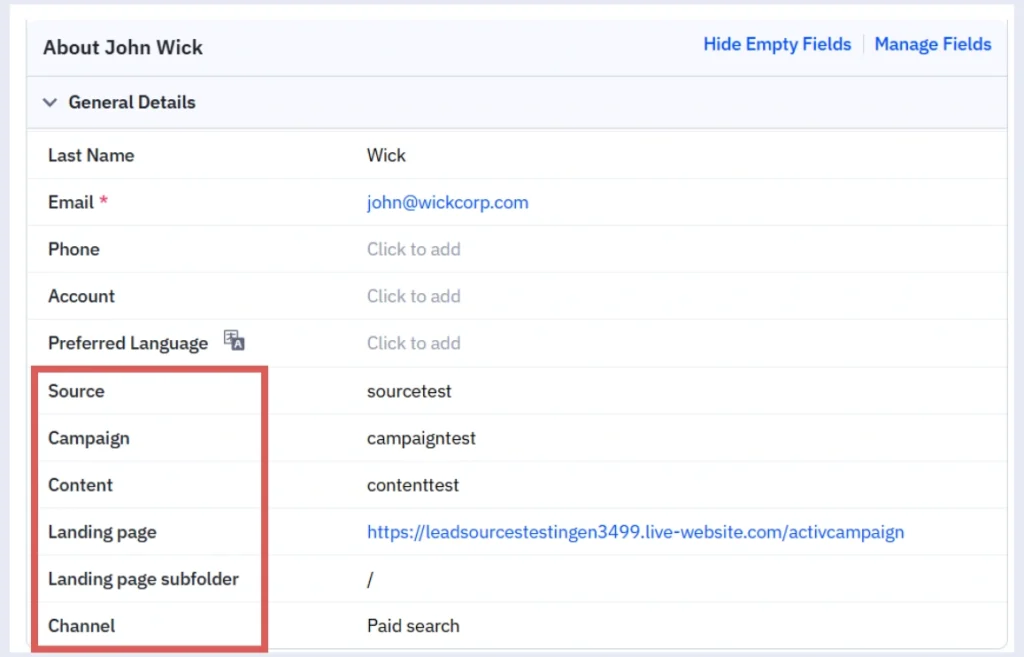
LeadSources will capture and store the lead data in these 7 hidden fields. This data will be visible from the ActiveCampaign form submissions page, alongside the form’s responses (name, email, etc.).