Prerequisite:
🔗Add the Leadsources script to your website
🔗Add hidden fields to your form
We are capturing leads in our form builder, alongside the lead source data (channel, source, campaign, etc.). We want to transfer all this data to Zoho CRM. This will allow us to track which leads are turned into paid customers, and therefore know where our sales are coming from: which channel, source, campaign, etc.
With this information, you can allocate our marketing budget more effectively by focusing on the marketing efforts that drive sales and revenue while discontinuing ads that fail to deliver results.
We will review two methods for transferring leads (and their source data) from your form builder to Zoho CRM:
- Native integration
- Zapier integration
Native integration #
If you are using one of these form builders, it comes with an native integration with Zoho CRM.
Click on the links below to follow the instructions to send your leads from your form builder to Zoho CRM:
Zapier integration #
If your form builder was not listed above, no worries! We are going to use Zapier to send your leads, alongside their lead source data, to Zoho CRM.
We will do it in 2 steps:
- Create custom fields in Zoho CRM that will store the lead source data
- Send the lead source data from your form to Zoho CRM using Zapier
Step 1: Create custom fields in Zoho CRM #
What is a custom field?
To store the lead source data within each lead in Zoho CRM, we need to create custom fields.
In Zoho, you currently use fields to populate additional information about your leads (address, name, company, etc.).
With custom fields, we will allow Zoho to store the lead source data in each lead: channel, source, campaign, term, content, landing page, and landing page subfolder.
To proceed, log in your Zoho CRM account.
On the top right corner, click the Setup gear icon. Under Customization click Modules and Fields.
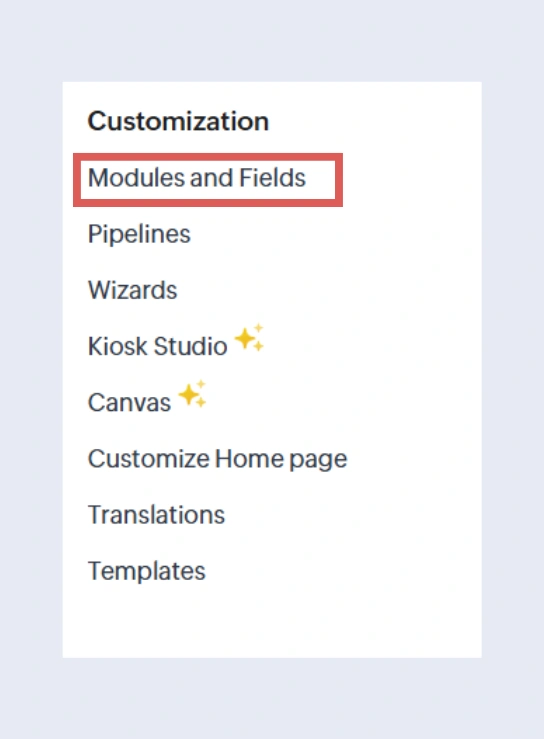
We want to add the custom fields in our Leads module, since this is in this module that we capture our incoming leads.
Click the 3 dots next to the Leads module –> Layout.
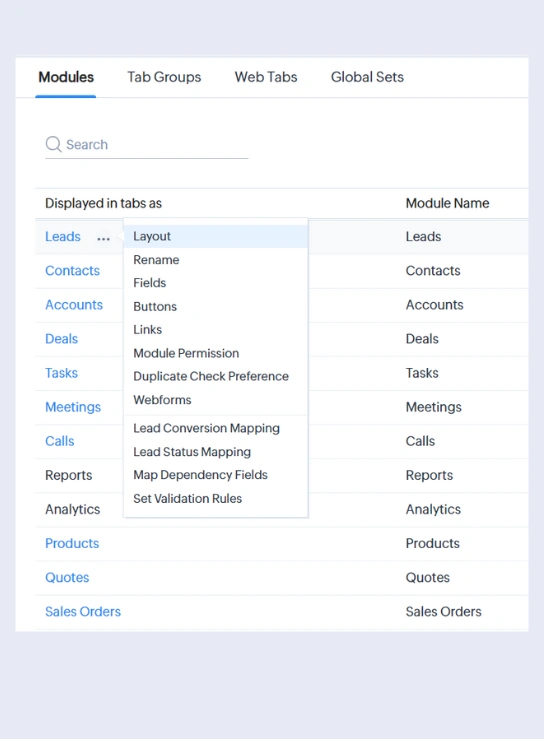
Select the layout you want to edit. By default, Zoho CRM has created a Standard layout. Select it.
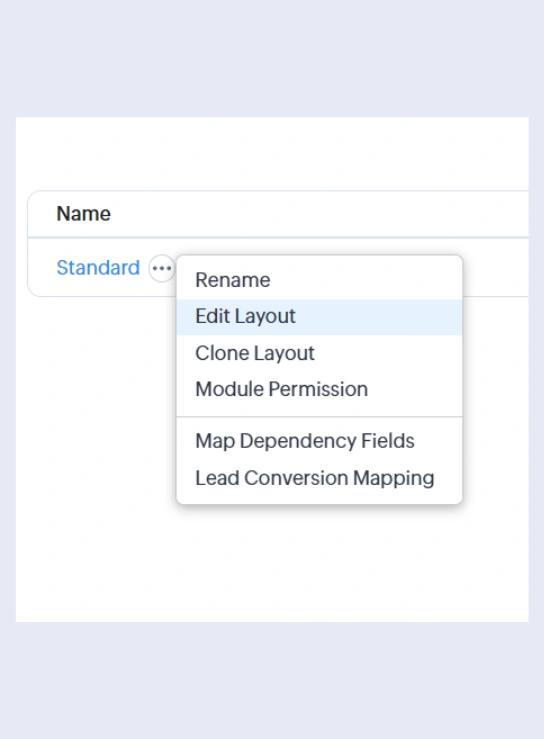
You land on the layout editor. We will create a new section that will contain the lead source data collected from the form.
Drag and drop a New section. Rename it, we chose to name it “Lead source”.
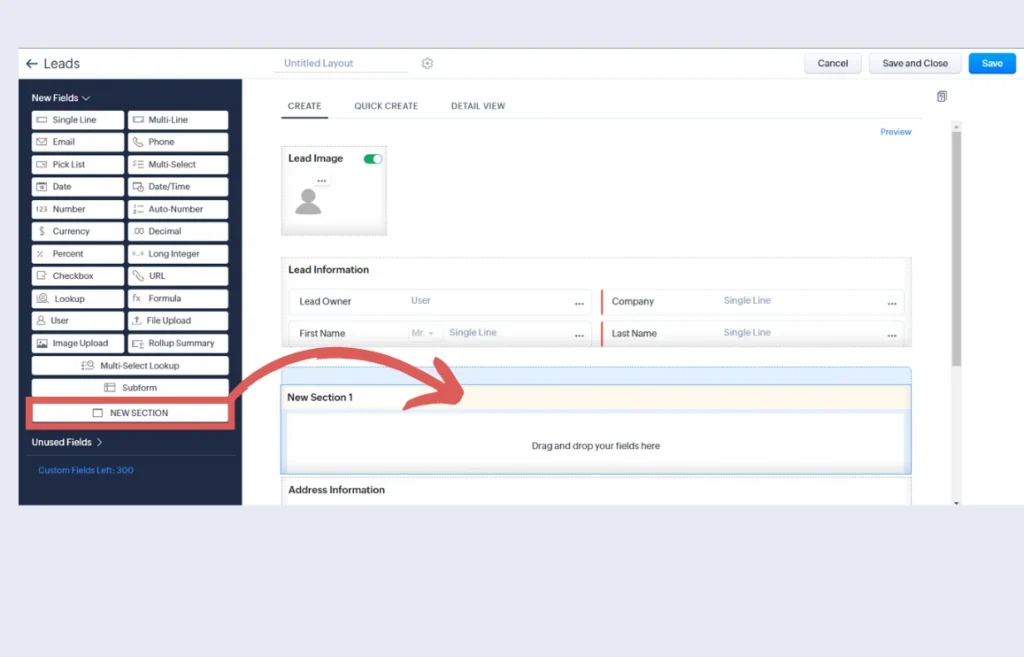
Now, let’s create the custom fields that will store the lead source data, starting with the Channel field.
Drag and drop a Single Line field inside our new section. Rename it Channel.
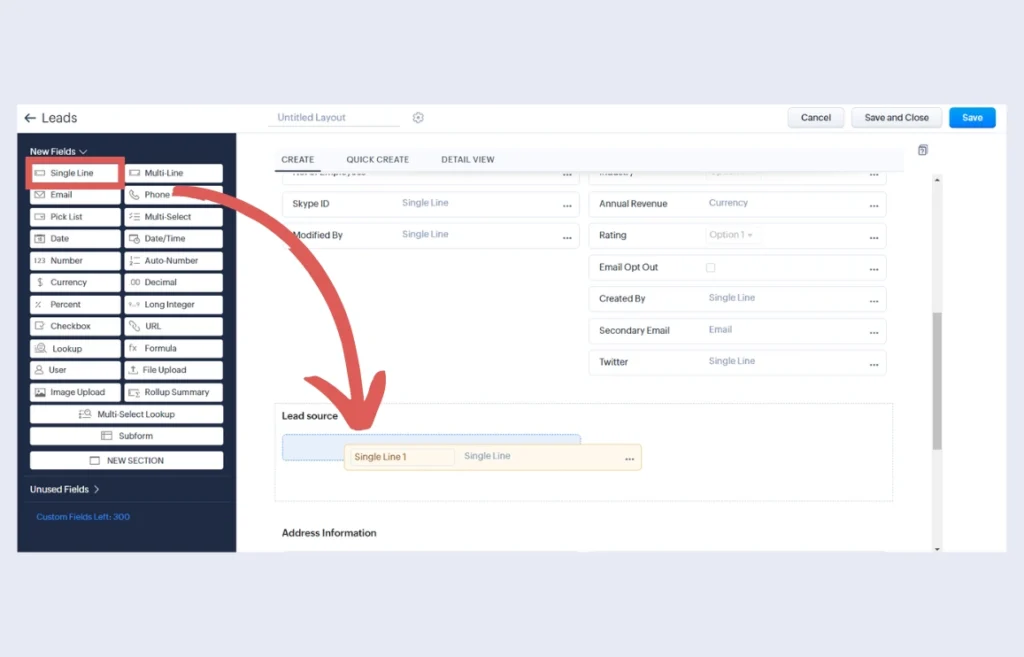
Do the same for the other lead source data, name them as follows:
- Source1 (we couldn’t name it source since this field is already used by Zoho CRM)
- Campaign
- Term
- Content
- Landing page
- Landing page subfolder
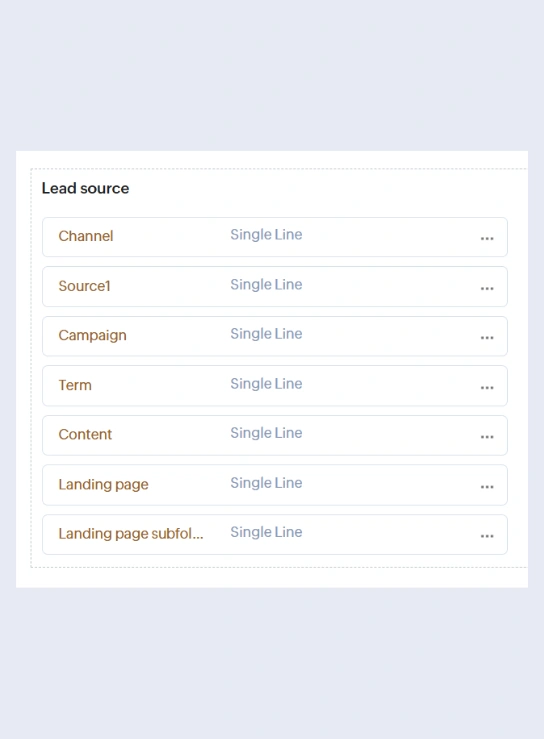
Click save.
You have now created the custom fields that will store the lead source data captured by your form.
Open a lead to see how the “lead source” fields are displayed.
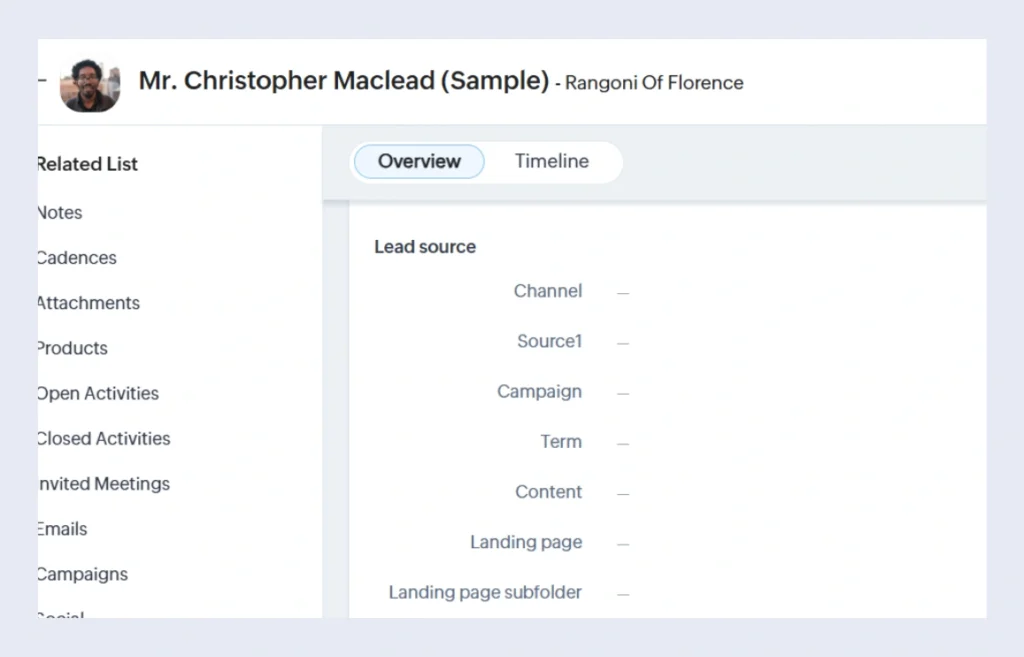
Now that we have created custom fields, let’s connect your form with Zoho CRM to send your leads from the form to Zoho CRM.
Step 2: Send lead source data using Zapier #
Zapier is a workflow automation software that creates workflows between different tools. In our case, we will create the following workflow:
When a new lead is captured in our form ➡️ Create a new Lead in Zoho CRM
Note: this workflow sends your new leads on Zoho CRM. If you are already automatically sending leads to Zoho with Zapier, make sure that you are not creating duplicate leads on Zoho CRM with the method described here. Adapt this guide to your specific needs.
Sign up to Zapier.com (it’s free). Note that to activate this automation, you will be prompted to switch to a paid Zapier plan.
Create a new “Zap”.
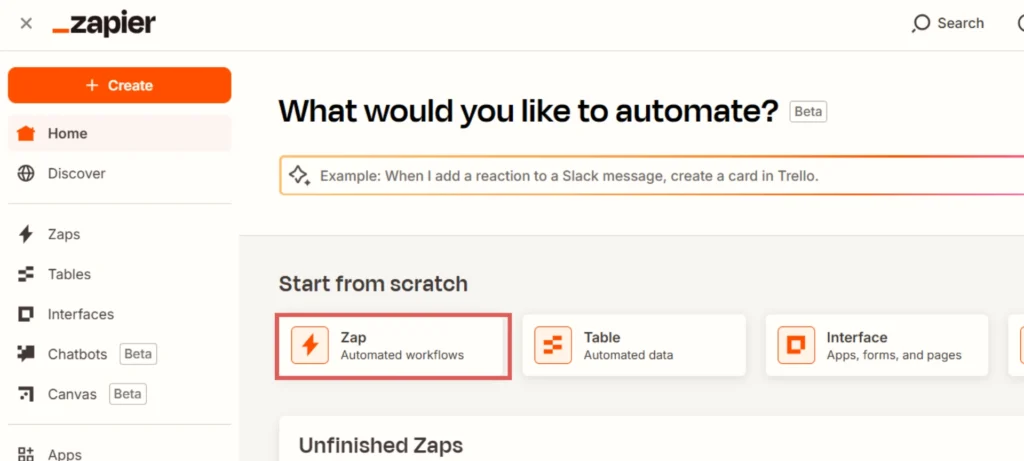
The Zap editor opens.
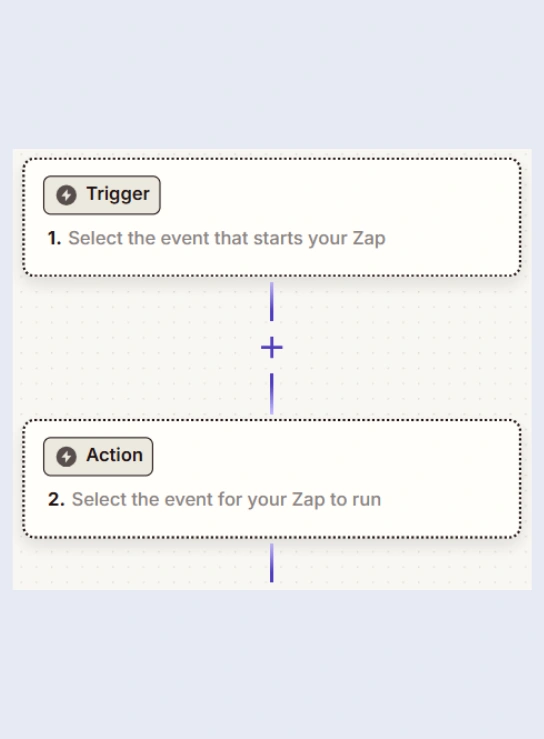
Click in the Trigger box.
Our trigger will be: a new lead is generated on our form builder. In our case, we use Typeform to collect leads. But you can connect another form builder – Zapier covers most popular form builders.
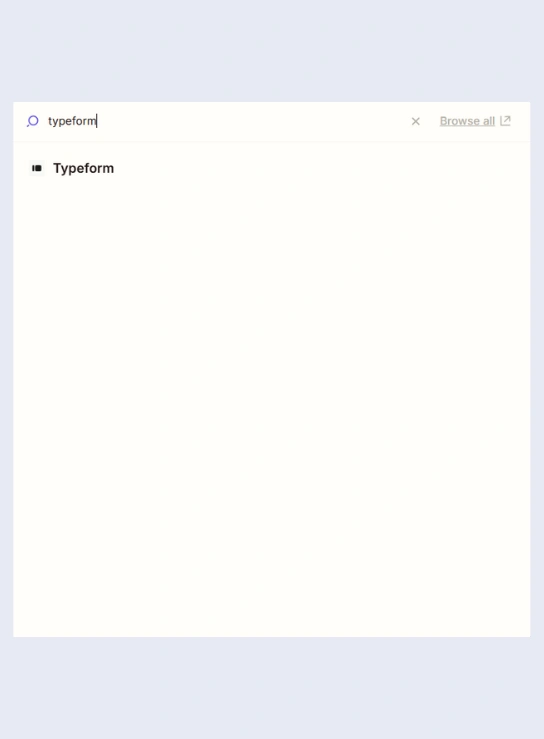
Search for your form builder in the search bar. Select it.
Set the Trigger Event as “New entry” – wording can vary.
Under Account, link your form builder account with Zapier.
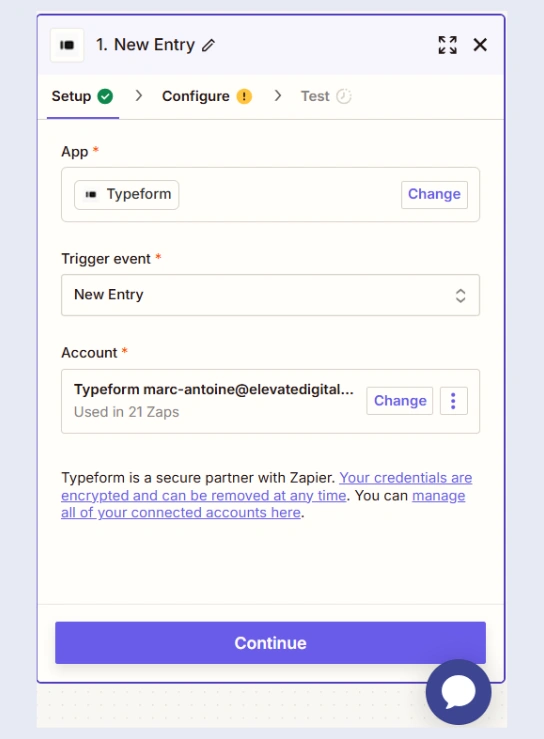
Click Continue.
Under Form, select the form you want to connect.
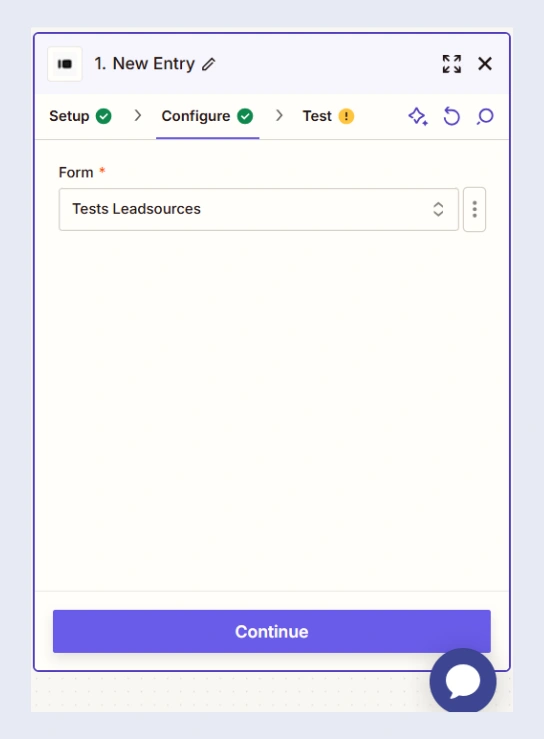
Click Continue –> Click Test Trigger –> Click Continue with selected record.
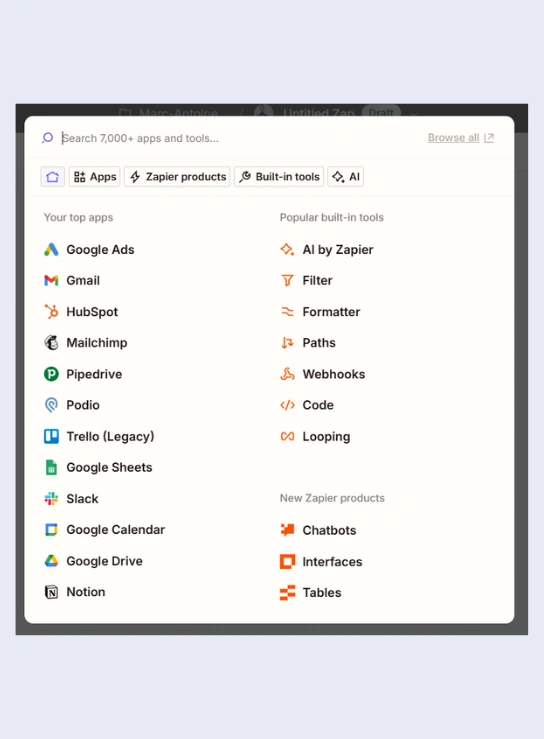
The pop-up for the Action box opens. Here we are going to define the Action event you want to occur on Zoho CRM when a new lead is generated in our form builder. In our case, we want to Create a module entry on Zoho CRM. Let’s go through the steps:
Search for Zoho CRM. Select it.
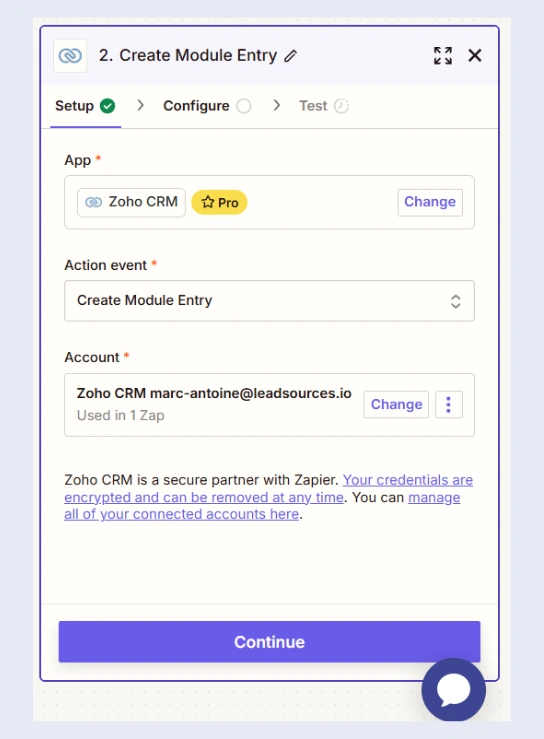
Under Action event, select “Create Module Entry“. Under Account, follow the steps to connect your Zoho CRM account. Click Continue.
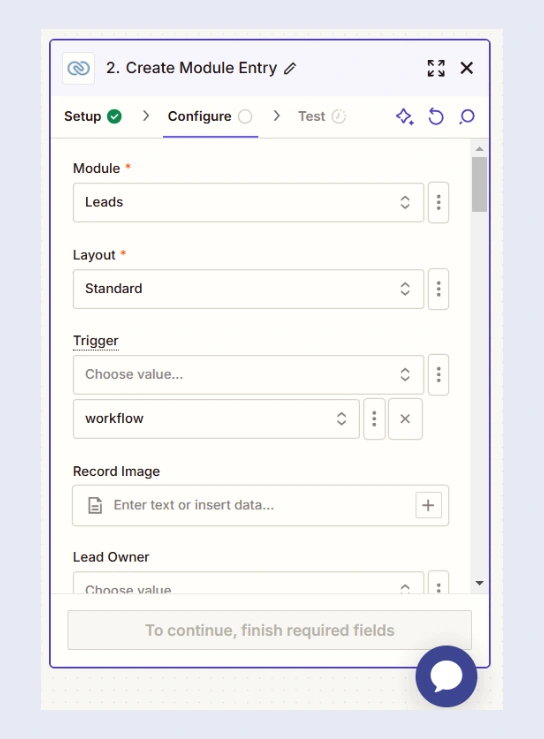
Next, let’s configure the event.
Under Module, select the Zoho CRM Module where you want to send your leads. In our case, we send the leads in the Leads module –> Layout=Standard.
Continue to fill out the fields with the information you want to pass from your form to Zoho CRM, until you arrive at the lead source fields (channel, source1, campaign, etc.).
Once you arrive at the source fields (channel, source1, campaign, etc.):
Context: We will now map each Zoho custom field with their associated hidden field from your form. For example, the “channel” hidden field of your form will be mapped with the “channel” custom field of Zoho CRM. This mapping allows you to send the lead source data (channel, source, campaign, etc.) from your form builder to your Zoho CRM. If you haven’t added hidden fields to your form yet, simply follow this guide first.
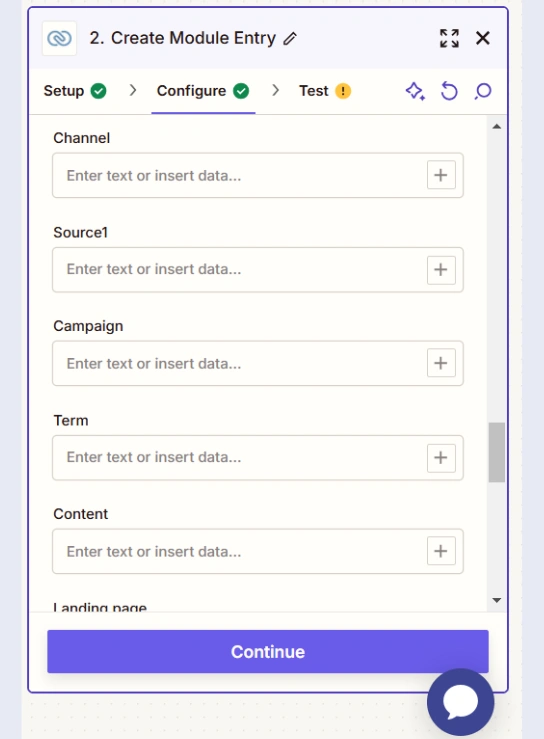
Let’s map the channel field: click the + icon, and select the form hidden field that you want to match.
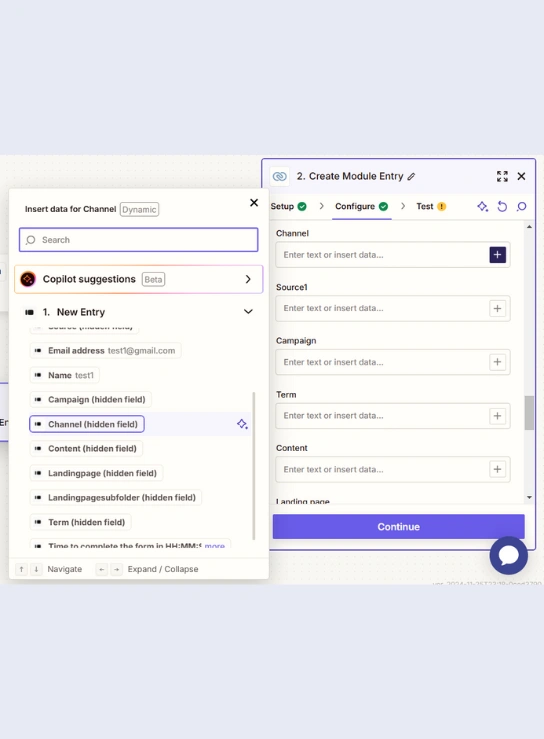
Map the rest of the lead source fields with their associated hidden fields:
- Source1
- Campaign
- Term
- Content
- Landing page
- Landing page subfolder
Click Continue. You enter in the Test step. Click Test step.
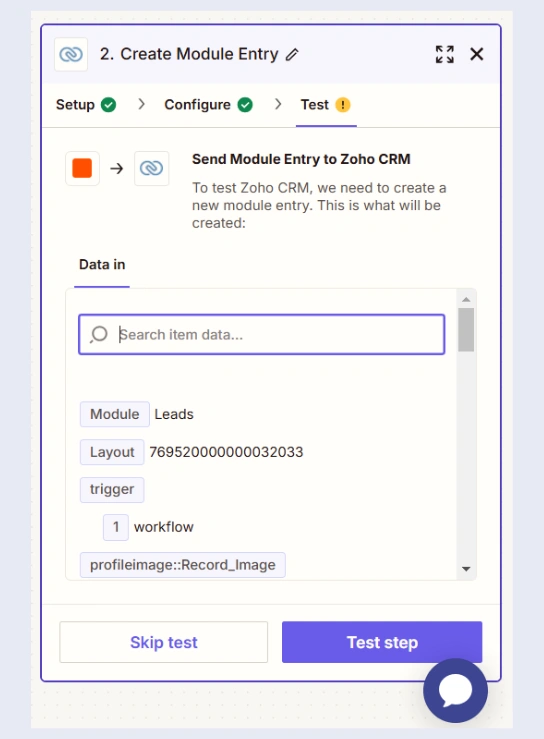
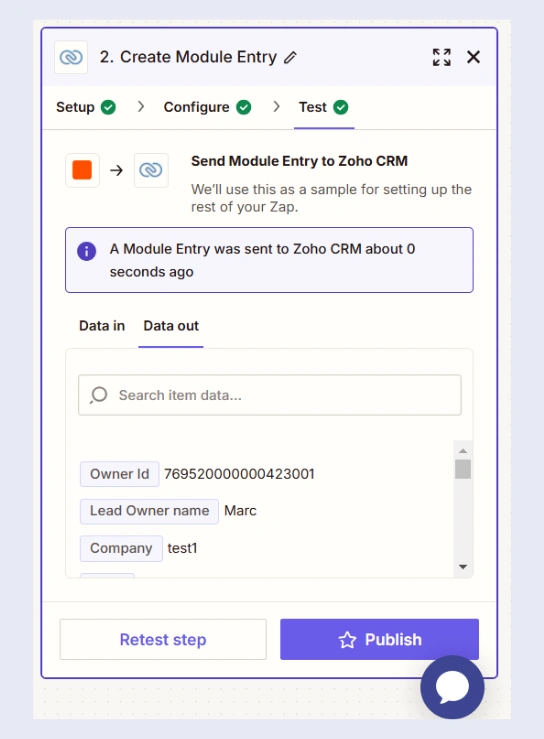
If the test data is properly passed to Zoho CRM, the test is successful, and a green check is added next to the Test title.
Click Publish. You will be prompted to switch to a paid Zapier plan to activate this automation.
Step 3: Test the automation #
Step 3: Test the automation #
To test the automation:
- Empty the cache of your browser
- Visit your website from the channel of your choice
You can use this link to emulate a Google Ads click:
🔗 https://yoursite.com/landing-page?gclid=123456789&wc_clear=true&UTM_source=Google+Ads&UTM_campaign=Your+Campaign+Name&UTM_term=Keyword+Clicked&UTM_content=Ad+Name
➡️ Replace the italic URL with your landing page URL
Fill out your form and submit it.
Head back to Zoho CRM –> Leads. You should see a new lead appearing, open it.
Under the Lead source section that we created previously, you should see the lead source data populated.
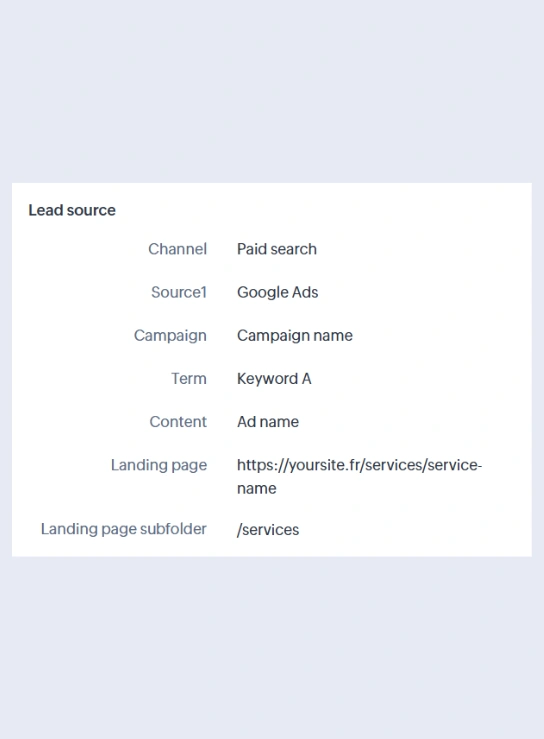
You can now track the source of your leads directly in Zoho CRM. When a lead is transformed as a paid customer, you can now trace back this sale to the exact channel, source, campaign, etc. that generated it… and adapt your marketing efforts according to the channel, source, campaign, etc. that bring revenue.


