Keap Forms is a form builder that allows you to capture website leads.
With Leadsources, you can track the source of the leads generated in Keap Forms, alongside 6 other lead source data.
In this guide, we will show you how to add hidden fields in Keap Forms to start capturing the source of your leads.
Step 1: Create custom fields #
Log in to your Keap account.
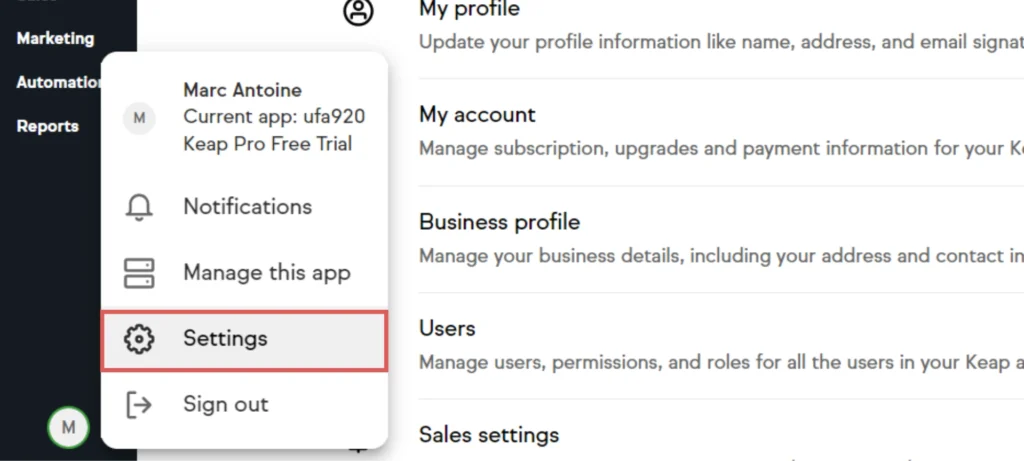
Click on your profile picture –> Settings
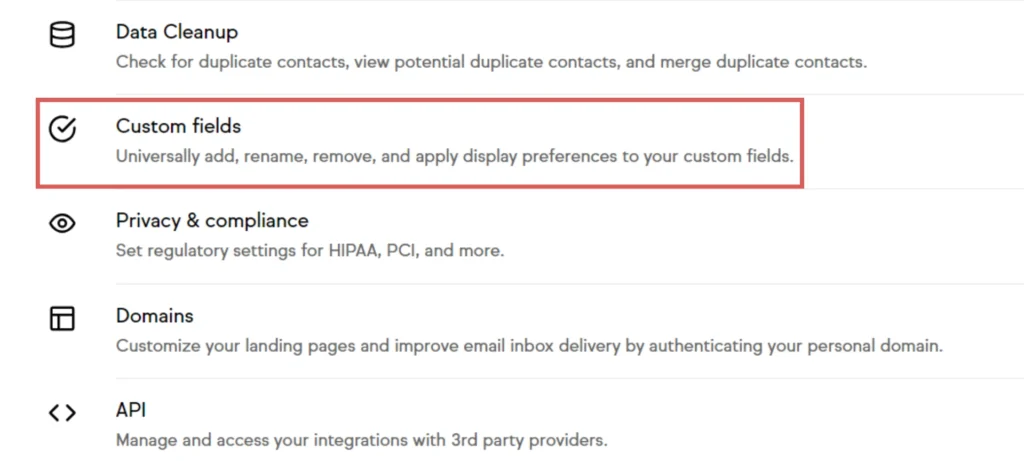
From the Settings page, click on Custom Fields –> New custom contact field
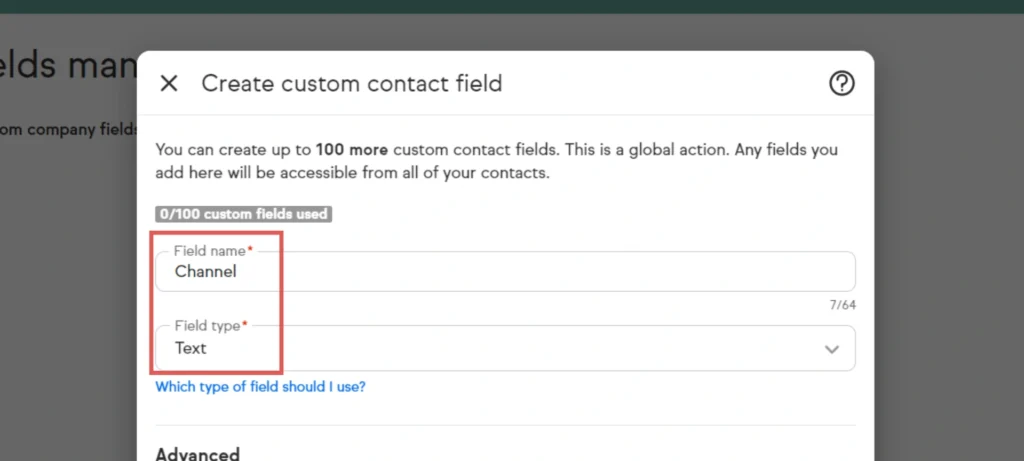
A pop-up appears. Let’s create the first custom contact field:
- Under Field name –> Write Channel
- Under Field Type –> Select Text
- Click on Create field
Let’s go through these steps again to create the remaining custom contact fields:
- Click Create new –> Custom contact field
- Add the field name and field type as described in the table below
| Field name | Field type |
| Source | Text |
| Campaign | Text |
| Term | Text |
| Content | Text |
| Landing page | Text |
| Landing page subfolder | Text |
Step 2: Add custom fields to your form #
Let’s add the fields we have created into your form.
Starting from your Keap dashboard:
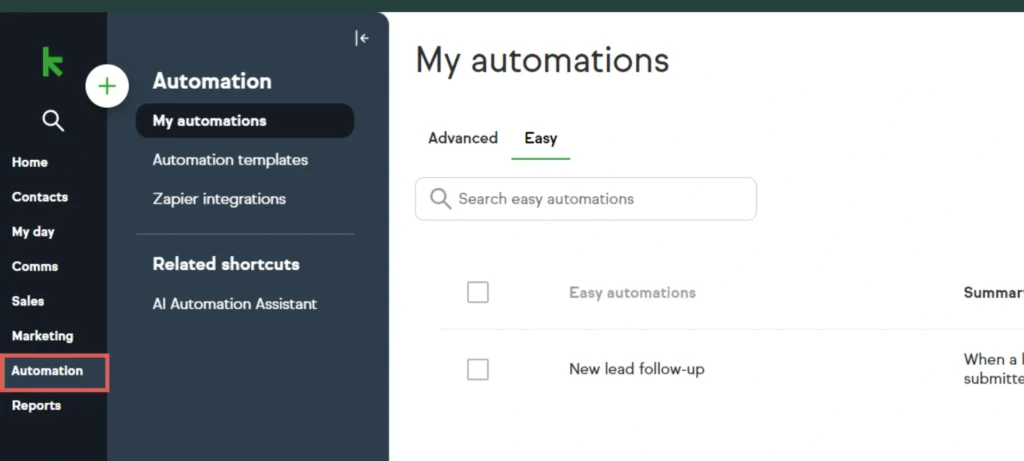
- From the left panel, click the Automation tab
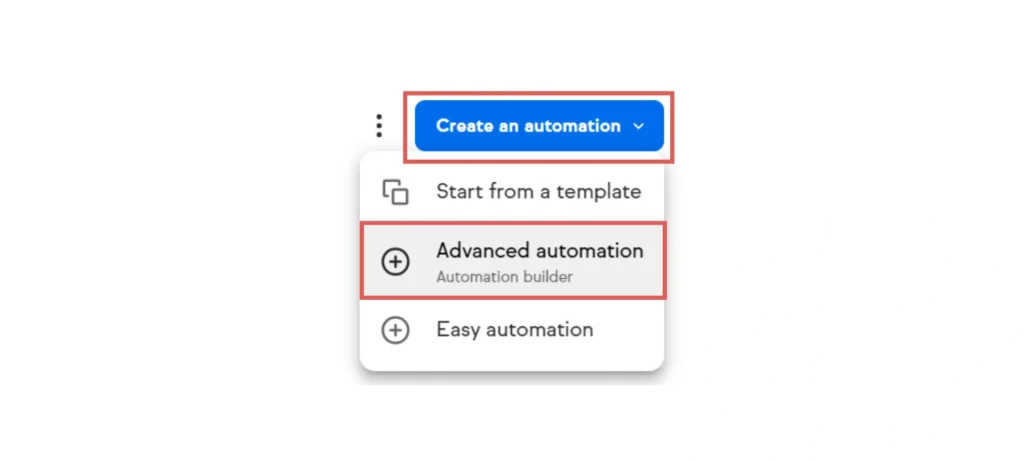
- Then, from the top left corner, click the Create an automation dropdown
- Click Advanced automation from the dropdown
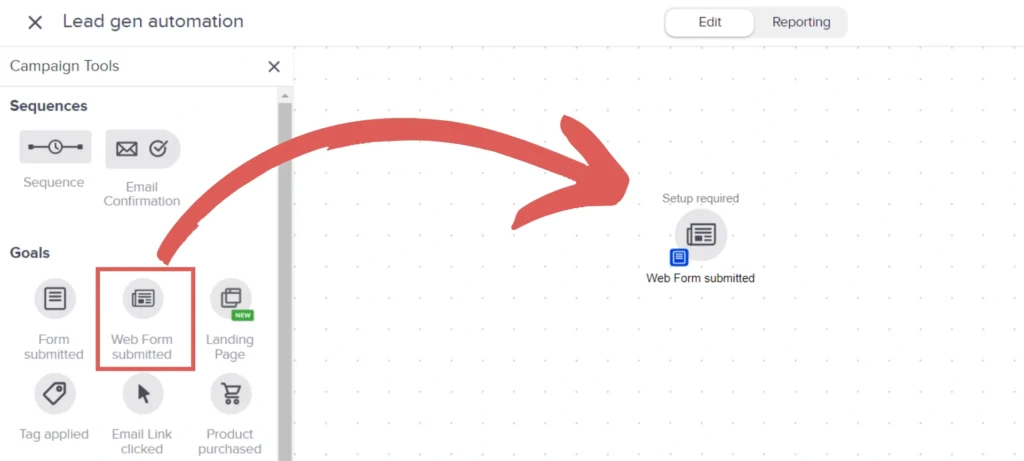
The automation page opens:
- Give it a title
- From the left column, drag and drop the Goal called Web Form Submitted
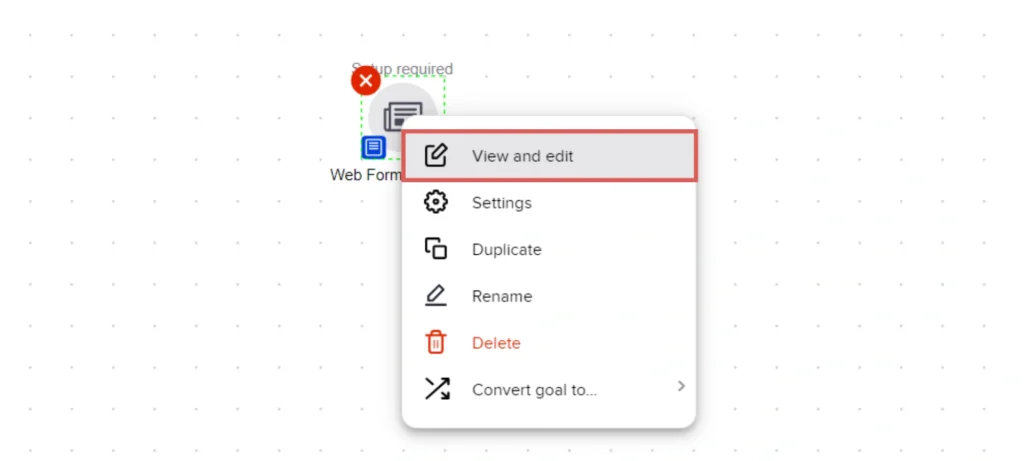
- Right click on the Web form submitted goal you just drop, and click View and edit.
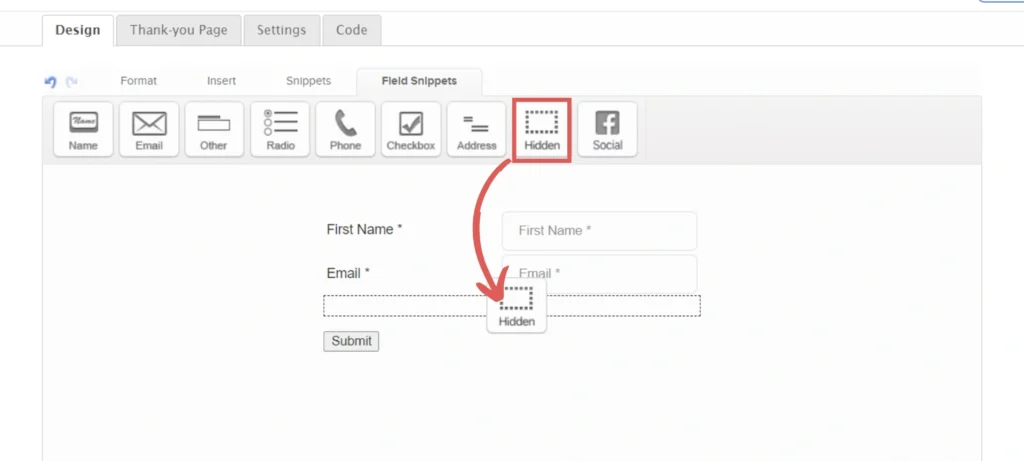
The designer window opens. Select the Field snippet tab.
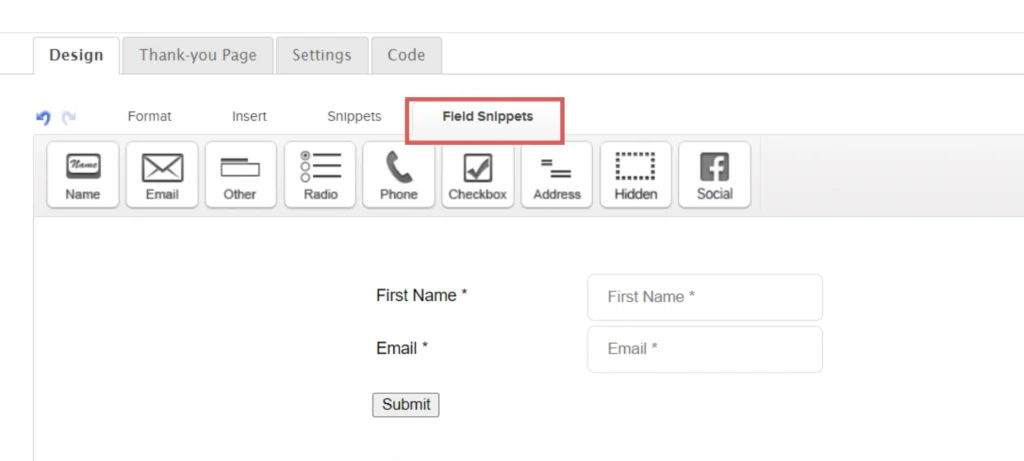
Let’s add our first hidden field to the form, the Channel field:
- Drag the and drop the field called Hidden into your form (drop it just about the submit button)
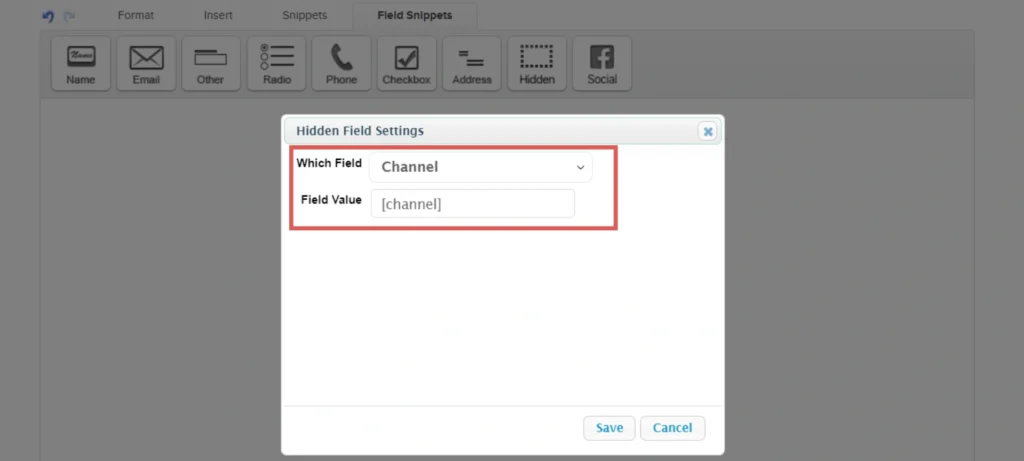
- The Hidden Field Settings pop-up opens
- Under Which Field –> Select the Channel field we created in the previous step
- Under Field Value –> Write [channel] (This will allow Leadsources to dynamically populate the channel into your form)
- Click Save
Follow the same process to add the rest of the hidden fields to your form:
- Drag the and drop the field called Hidden into your form
- Fill out the Which Field and Field Value with the following values:
| Which Field | Field Value |
| Source | [source] |
| Campaign | [campaign] |
| Term | [term] |
| Content | [content] |
| Landing page | [landingpage] |
| Landing page subfolder | [landingpagesubfolder] |
Step 3: Publish your form #
You are still in the designer of the Automation page.
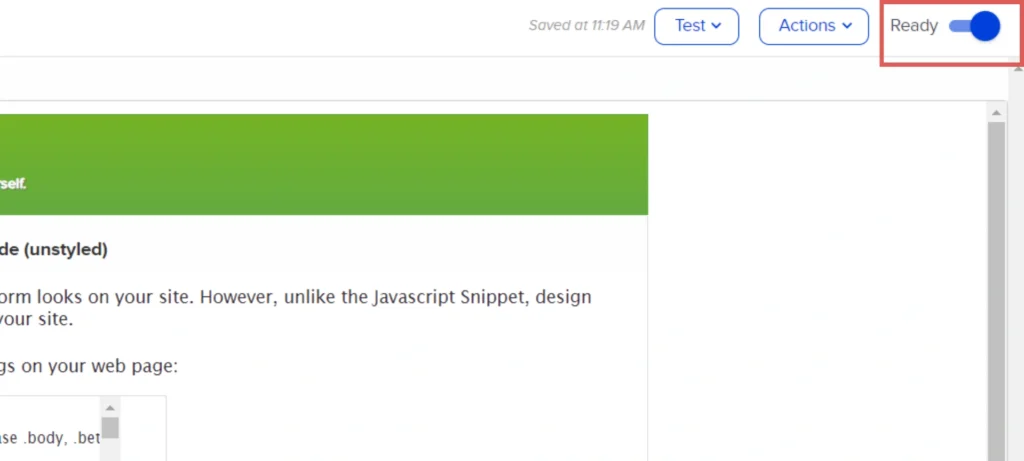
Make sure activate your form by clicking on the Draft switch on the top right corner. It should then appear as Ready.
From there:
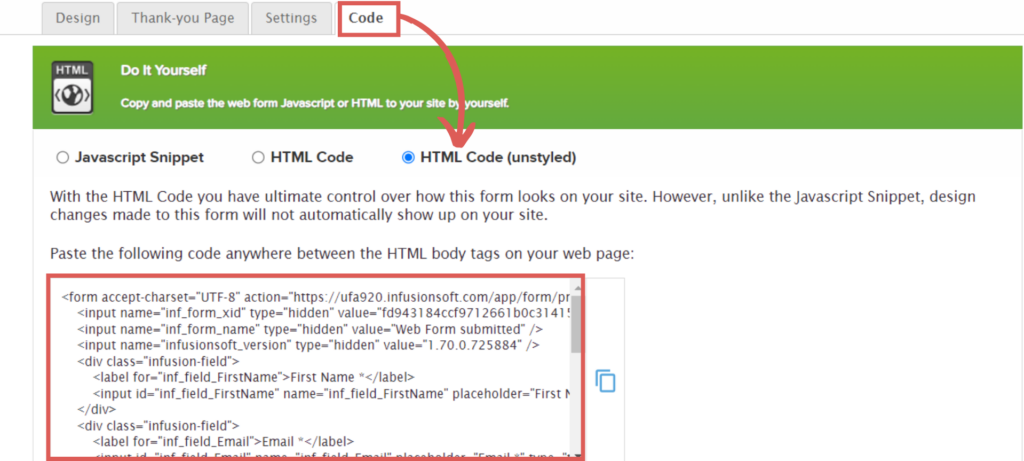
- click the Code tab –> Select html code.
- Copy the html code generated, and paste it on your website where you want your form to appear.
Step 4: Publish the automation #
Quit the design page, to return to the Automation page.
Click on the Publish button located at the top right corner.
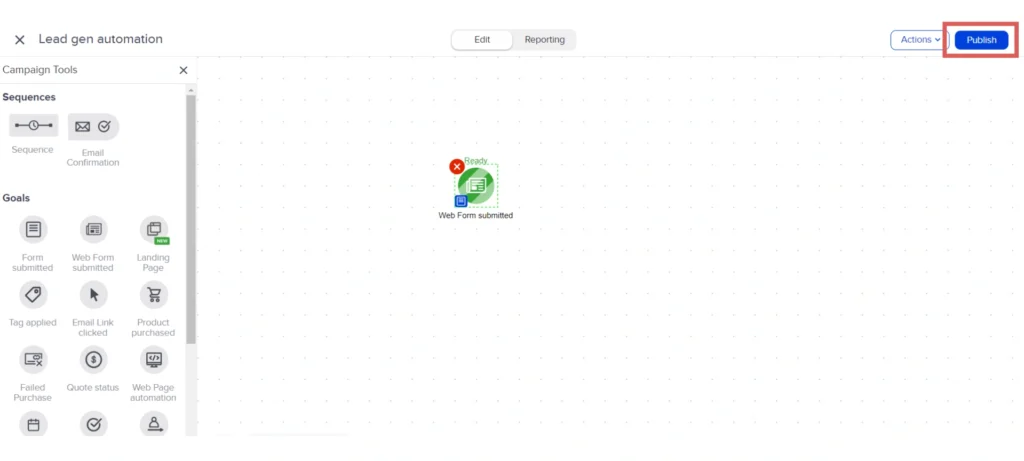
You are all set!
Leadsources will capture and store the leads data in these 7 hidden fields. This data will be visible from the Keap Forms submissions page, alongside the form’s responses (name, email, etc.).


