Elementor form is a form builder feature included in Elementor Pro, and that allows you to capture leads on your website.
With Leadsources, you can track the source of the leads generated in Elementor forms, alongside other lead source data.
In this guide, we will show you how to add hidden fields in Elementor forms to start capturing the source of your leads.
Step 1: Open the form #
Log in your WordPress backend
Open with Elementor the page containing the Elementor form.
Click on the form you want to edit.
Step 2: Add the hidden field #
Context: In this step, we set up the hidden fields one by one to store the lead source data captured by LeadSources.
To add a hidden field to Elementor forms:
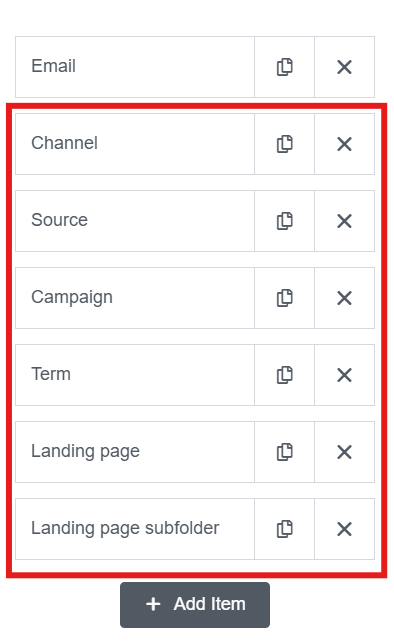
- Under Form Fields, click on “+ Add Item“
- In the Type field, select “Hidden“
- In the Label field, write “Channel“
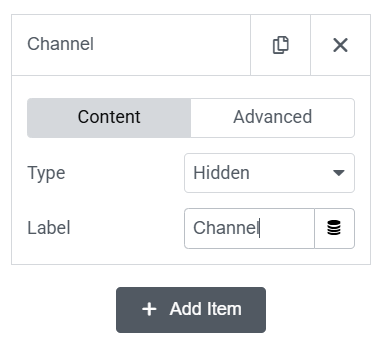
- Click “Advanced“
- In the Default Value field, write [channel]
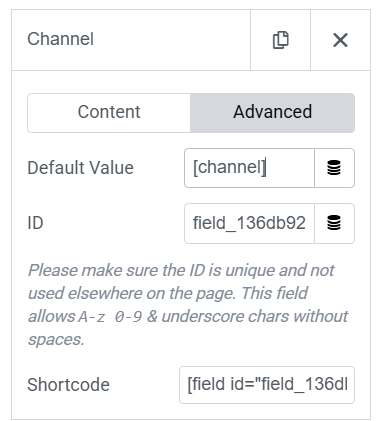
You have now added the channel hidden field that will capture the channel for each lead.
Create the rest of the hidden fields following the same process and write the information below:
| Label | Default Value |
| Source | [source] |
| Campaign | [campaign] |
| Term | [term] |
| Content | [content] |
| Landing page | [landingpage] |
| Landing page subfolder | [landingpagesubfolder] |
You are all set!
Leadsources will capture and store the leads data in these 7 hidden fields.